Photoshop C1L4 Spot Healing Brush 2
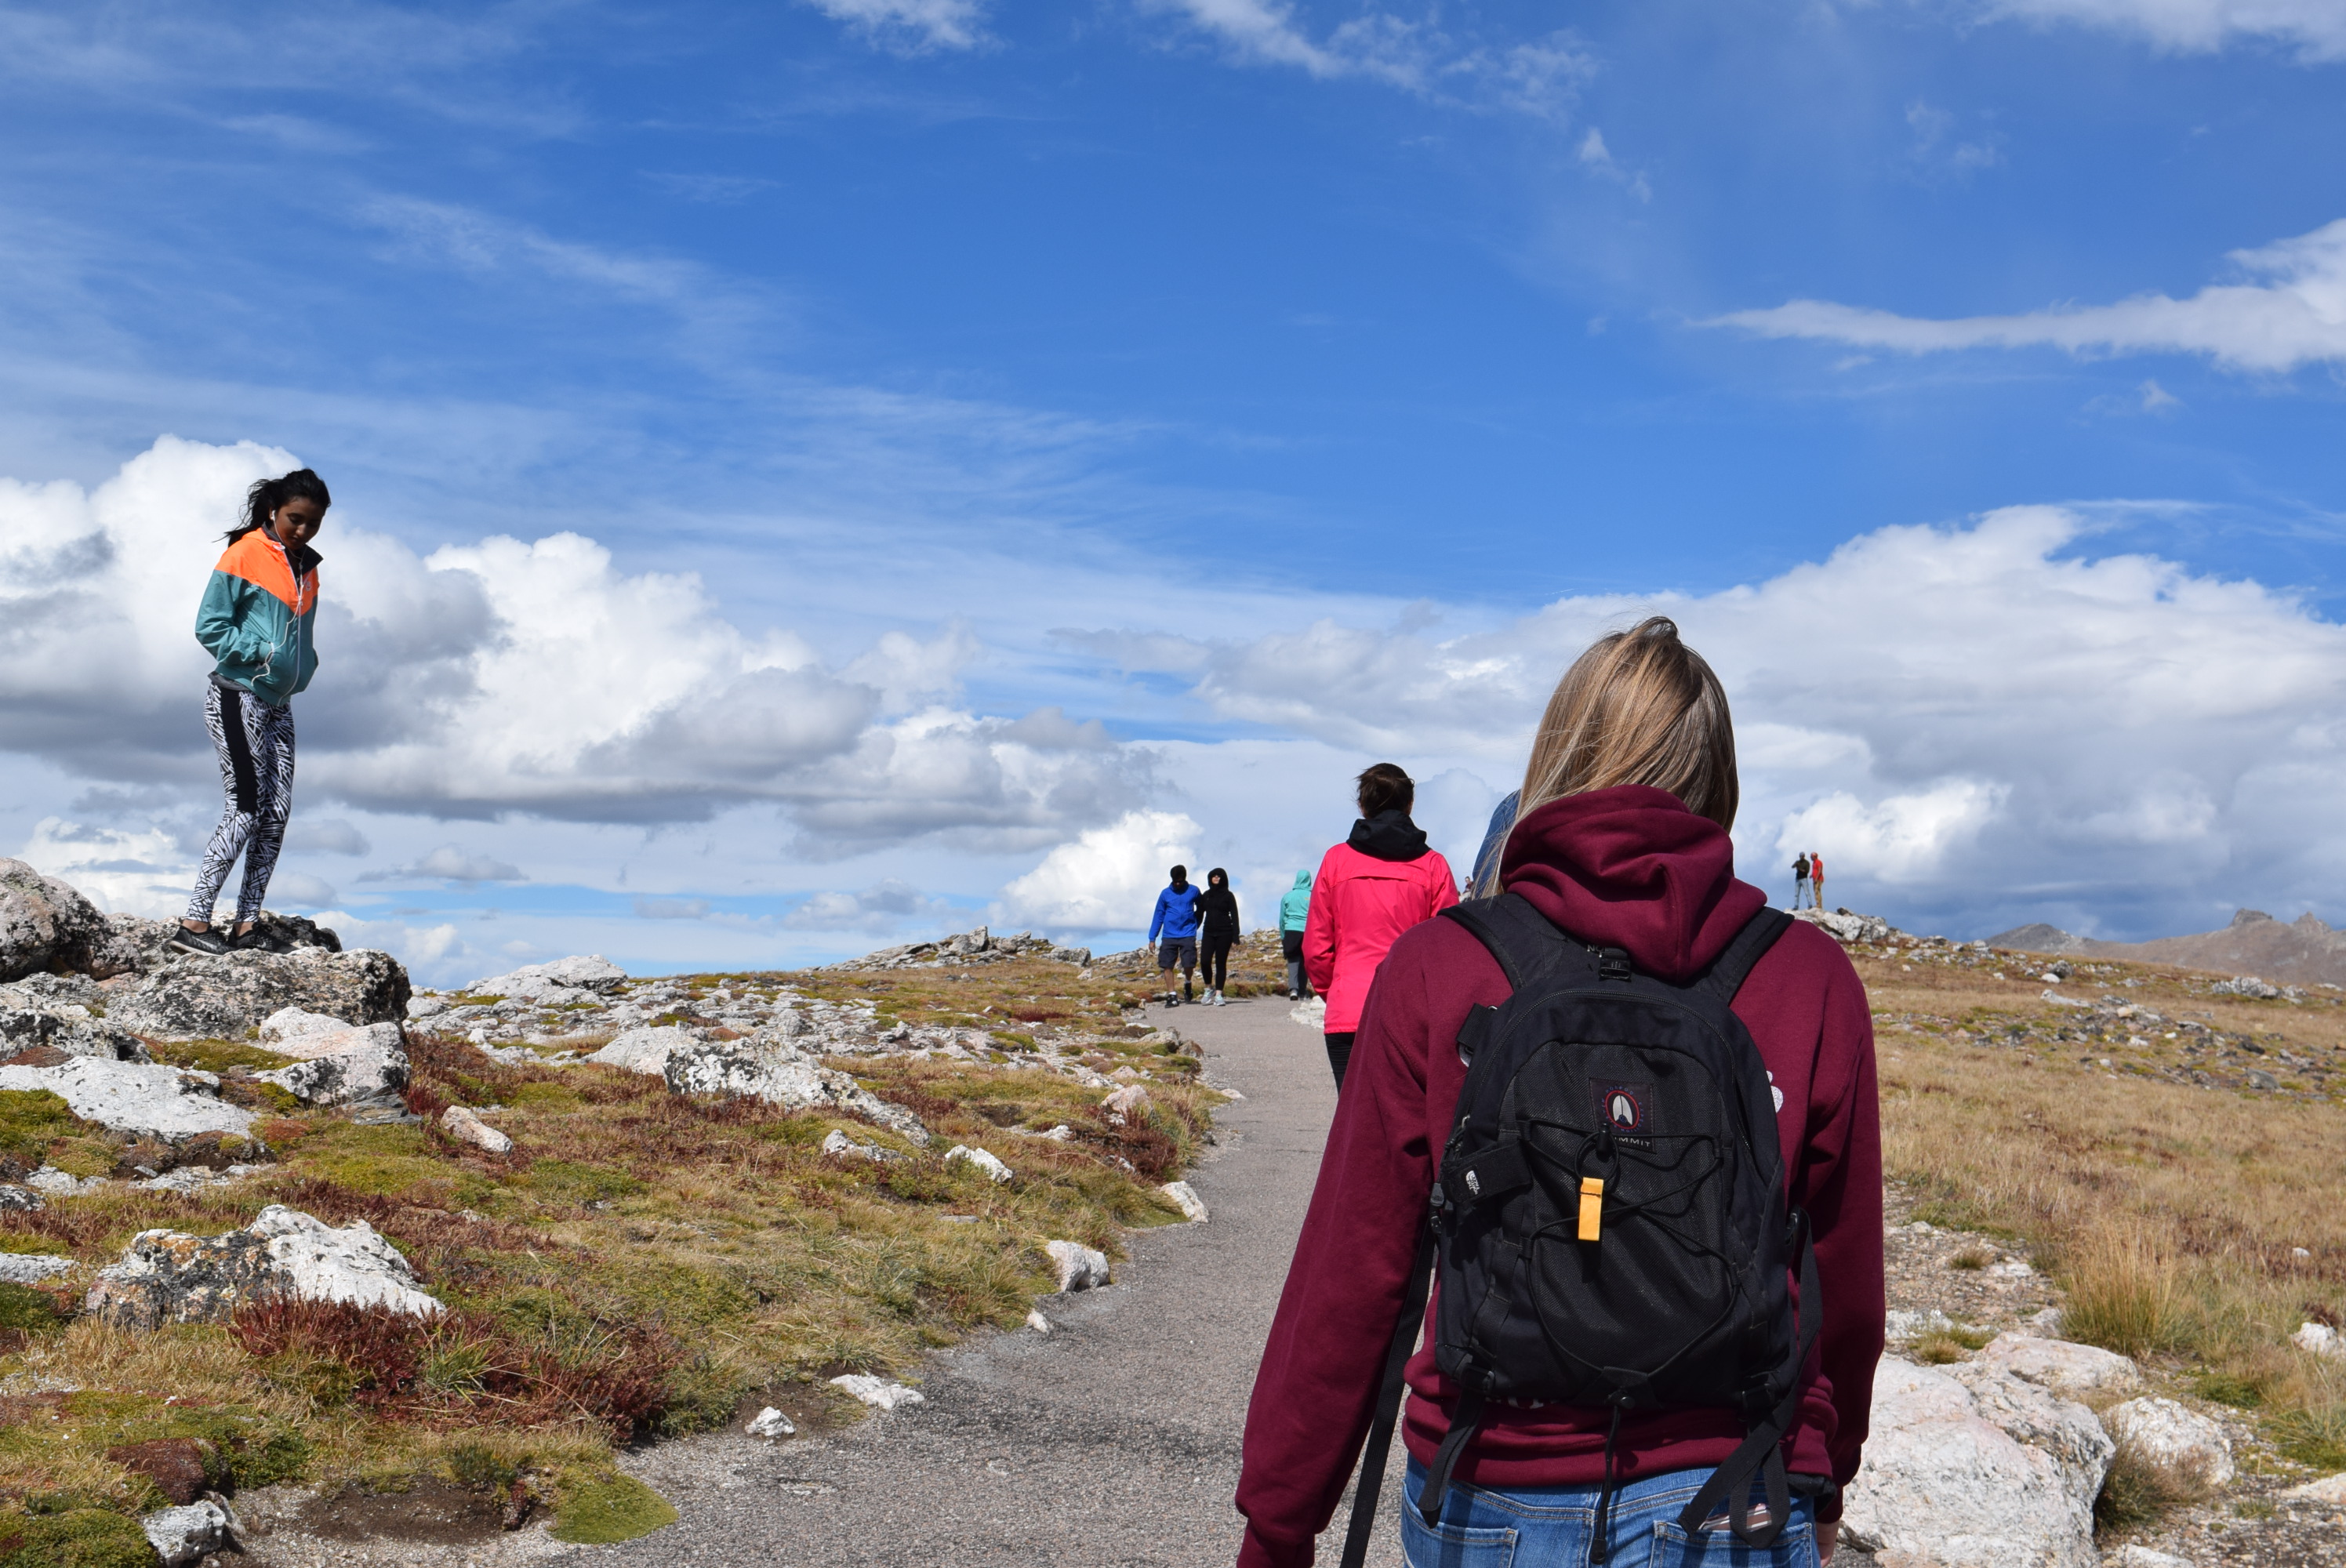
- Download following picture
- Open it in Photoshop.
- Select the Spot Healing Brush Tool
- Resize the circle using [ or ] to make the brush wider than the person standing on the left as seen below.
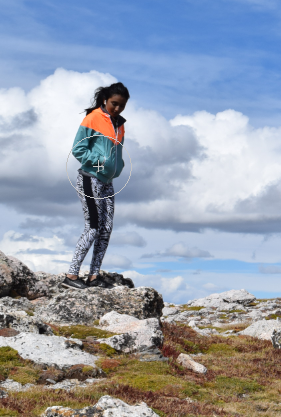
- Draw over the person so that they are all covered with one click.
- Use Ctrl-Alt-Z to undo if you don't like what it did and resize the brush and try again till you like it.
- Select the Background layer in the layer panel.
- Create an Adjustment Layer for Hue and Saturation. Click
 in the layer panel -> Hue/Saturation.
- Adjust with the Hue and Saturation Sliders to see what it does to the picture.
- Change the picture to look better to you. Make sure that I can see a difference from the original.
- Use the text tool to add your name to the image
- Flatten the Image.
- Save the file with the name mountainsYourName.png as a png.
- Turn it in the picture with the name mountainsYourName.png
COPYRIGHT © 2023-2025 LEARNSOFTWARETODAY.COM